Showing posts with label Rice Dishes. Show all posts

Thursday, May 21, 2015

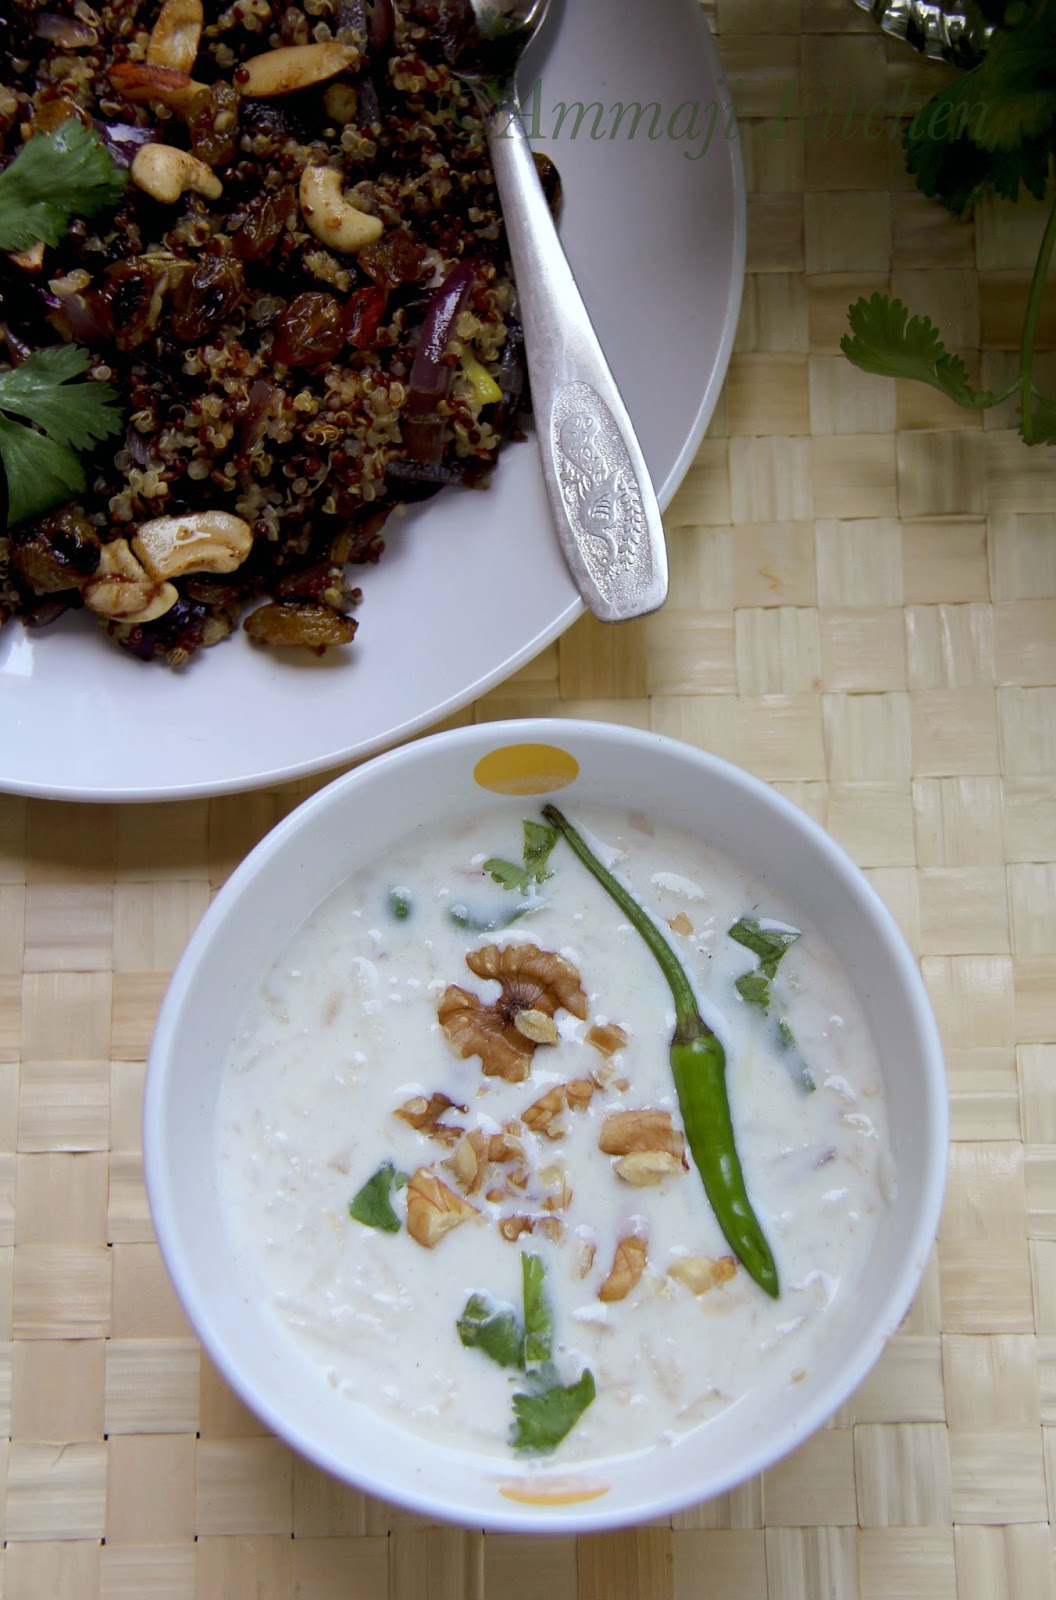
Mooli Raita Recipe | Mullangi Raita | Radish Raita | How to make mooli Raita

Yum
Mooli Raita
Mooli Ka Raita is a Kashmiri style raita that can be served as a side for parathas & rice dishes. The original recipe has a raw grated radish, but that earthy smell of radish is not appealing to any one in house. So to get rid of that smell I fried it with little ghee to make it more tempting & edible.
Mooli Raita
Prep Time-10mins
Cook Time-5mins 
Serves-2people
Ingredients 
1/2Radish grated {Mooli}
1Tbs ghee
2Green chili sliced
2Cups yogurt {Dahi}
1Tsp jeera powder {Cumin powder}
Few walnuts to garnish
2Tbs coriander leaves for garnish
1Tsp sugar
Salt to taste
Directions
- Heat pan with ghee. To that add grated radish & fry it till the raw smells goes off. It take like 1min.
- In a bowl add yogurt, salt, sugar, jeera powder & chili's. 
- To that add cooked radish & mix them well. Adjust salt if needed.
- Garnish with walnuts & coriander leaves. 
- Raita is ready to serve.
Mooli Raita
Follow me on "Facebook", "Google+", "Pinterest" for daily updates. Leave me a comment on any queries regarding this recipe & I will be able to answer it for you as soon as possible.

Wednesday, February 18, 2015

Tomato Rice

Tomato Rice is a simple yet flavorful dish. It's easy to make & requires less ingredients & time. If you are making with a fresh cooked rice it might take a little more time, but for a left over rice it is a super fast dish. On those lazy days when I have to cook just for myself I prefer one pot meals rather for an elaborated lunch. This is one of many versions to make this rice, but I prefer this version because of it's simplicity.
Enjoy this dish!!!
For this week theme on BM I'm presenting "Cooking for One". Enjoy the dishes & don't miss the update. Check out the Blogging Marathon page for the other Blogging Marathoners doing BM#49.
Prep Time-5mins
Cook Time-30mins
Serves-1person
Ingredients
2Cups cooked rice / Basmati rice
1Small onion sliced
2Big tomatoes chopped
1/2Cup cauliflower florets
1Tbs oil
2Bay leaves
1Tbs ginger garlic paste
1Tsp garam masala powder
1Tsp red chili powder
Salt to taste
1/2Cup chopped mint & coriander leaves
Directions
- Heat pan with oil. To that add bay leaves  & ginger garlic paste. Stir them for few seconds.
- Next add in onions & cook them for 2mins while sautéing in between till they are soft.
- Add in tomatoes & cauliflower florets to pan & cook them for 5mins to 10mins on low heat with a closed lid.
- Once tomatoes are soft & cooked perfectly sprinkle with garam masala, chili & salt. Mix them well & allow them the curry to come together.
- Sprinkle in mint & coriander leaves. Next add in rice & mix them well. Adjust salt & chili powder if needed.
- Cook on low heat for 5mins & Stir in between to avoid sticking rice to bottom of the pan. Switch off heat & close pan with a lid. This makes the rice more flavorful & tastier.
Note
- Though I limited to cauliflower, you can add in more veggies like carrots, beans, green peas, capsicum to this dish.
- You can use leftover rice or freshly cooked rice in making this dish.
Follow me on "Facebook", "Google+", "Pinterest", "Instagram" for daily updates. Leave me a comment on any queries regarding this recipe & I will be able to answer it for you as soon as possible.

Monday, November 3, 2014

Vegetable pulao


Vegetable Pulao
Pulao is a simple rice dish cooked with spices & herbs. The spices & herbs will give a nice taste, aroma & lift to the dish. This rice can be paired with your choice of dry or gravy curry dish. I used normal rice in this dish, but replacing it with basmati rice will enhance the flavor more for the rice. You can use a pressure cooker or electric cooker in making it. I went with pressure cooker in making this recipe.
Vegetable Pulao
Prep Time-10mins {Chopping veggies & arranging items}
Cook Time-40mins 
Serves-2People
Pair this dish with raita, kurma & any gravy dish.
Ingredients
1Cup + 1/4Cup raw rice
2&1/2Cups water
1Cup chopped carrots & beans
1Cup cauliflower florets
1Big onion sliced
5Green chili's sliced
1/2Cup chopped mint
1/2Cup chopped coriander leaves
1Tbs ginger garlic paste
4Tsp oil
2Bay leaves
2Elachi's
1Tsp shahajeera
Few cinnamon barks
4Cloves
Salt to taste
Directions
1.Heat pressure cooker with oil. To that add elachi's, bay leaves, shahajeera, cinnamon barks & cloves. Fry them for few seconds.
2.Add ginger garlic paste &onions to cooker. Fry them till the raw smell of ginger garlic vanishes & meanwhile the onions will be slightly fried too.
3.Now add in green chili's, carrots, beans & cauliflower florets. Stir for few seconds & mix in with onions & spices.
4.Add in rice, water, mint, coriander leaves & enough salt. 
5.Close it & pressure cook for 3 whistles. Once the pressure cooker cools off, transfer it to a serving bowl & enjoy with side dish.
Note
- If you are using a electric cooker then cook the steps 1 to 3 on a stove top using a pan. Then you can transfer contents to a electric cooker & follow the step four. Cook it as per instructions & yummy pulao is ready.
Vegetable Pulao

Follow me on "Facebook", "Google+", "Pinterest", "Instagram" for daily updates. Leave me a comment on any queries regarding this recipe & I will be able to answer it for you as soon as possible.

Tuesday, September 23, 2014

Bulgar Pilaf ~ Turkish Dish

Bulgar Pilaf
Bulgar Pilaf is a traditional Turkish dish consists of durum wheat or dalia, veggies & spices to flavor it up. It is a healthy dish that consumes less time & efforts in making it. Bulgar Pilaf is served as a side dish to kebabs or any  
Bulgar, the main ingredient or the hero of this recipe tastes nutty in flavor & it is also very high fiber. Bulgar is sold par-boiled & dried in stores which makes it easy to cook. In Turkey the coarsen bulgar is used in making pilaf & the soft grounded makes a tasty tabbouleh salad & a delicious kibbeh.
There is a middle eastern restaurant that we love to visit on regular basis & they serve tofu kebabs along with bulgar pilaf & a Mediterranean salad. I felt this recipe was tasting very similar to the pilaf they serve. Enjoy this filling dish.
To know what my other friends are cooking, check out the Blogging Marathon page for the other Blogging Marathoners doing BM# 44
Bulgar Pilaf
Prep Time-10mins | Cook Time-20mins (max) | Serves-2people
Ingredients
1/2Cup bulgar wheat
1Cup water
1Small onion chopped
1Garlic minced
1Carrot chopped
1Bell pepper chopper
1Tbs tomato paste
1inch cinnamon stick
1Tsp fresh black pepper / chili powder {Used red chili powder}
Salt to taste
2Tbs oil
Cilantro & lemon for garnish
Directions
- Heat pan with oil. To that add onions, garlic & cinnamon stick. Cook till onions are translucent.
- Next add in carrots & bell pepper. Stir it once.
- Next add in bulgar & fry for few seconds.
- Then add in tomato paste, water, salt & chili powder. Mix them & close with a lid.
- Cook on low flame till the bulgar is cooked completely. Adjust taste if needed. Switch off heat.
- Garnish with cilantro & lemon.
- Serve with raita of your choice.
Note
- You can replace wheat to bulgar.
- Customize this with your choice of veggies.
Bulgar Pilaf

Follow me on "Facebook", "Google+", "Pinterest" for daily updates. Leave me a comment on any queries regarding this recipe & I will be able to answer it for you as soon as possible.


Thursday, September 18, 2014

Arroz Con Verduras ~ Peruvian Cilantro Rice

Arroz Con Verduras
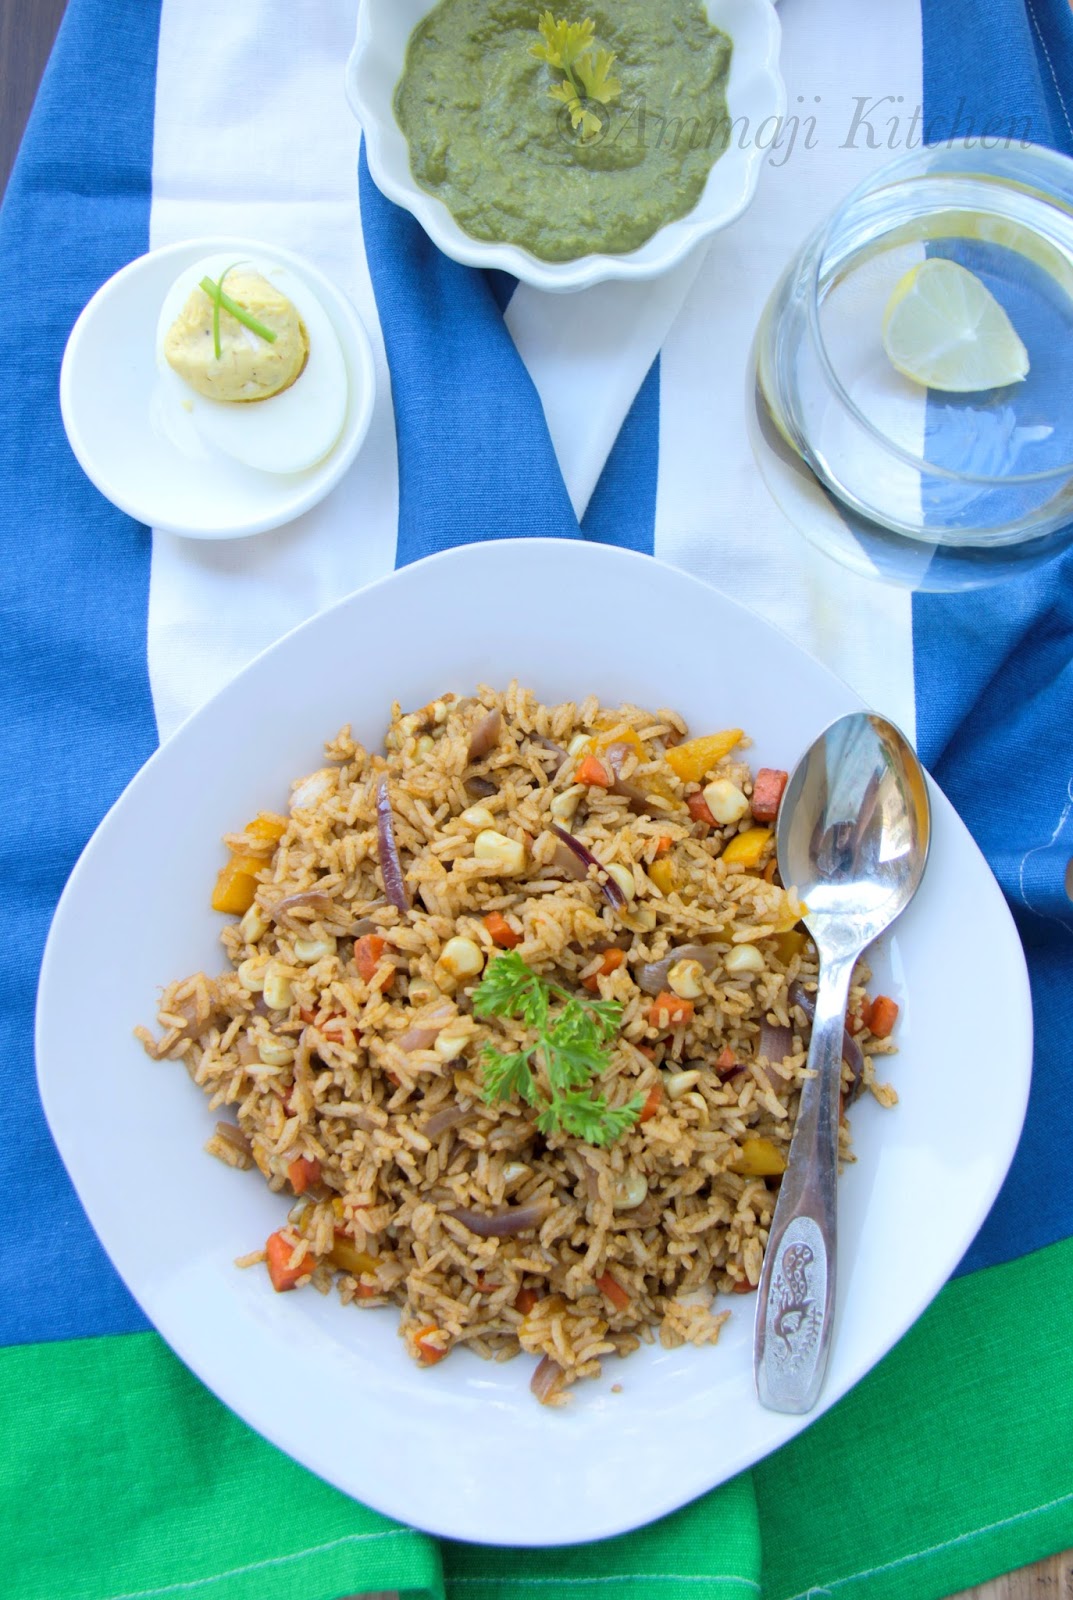
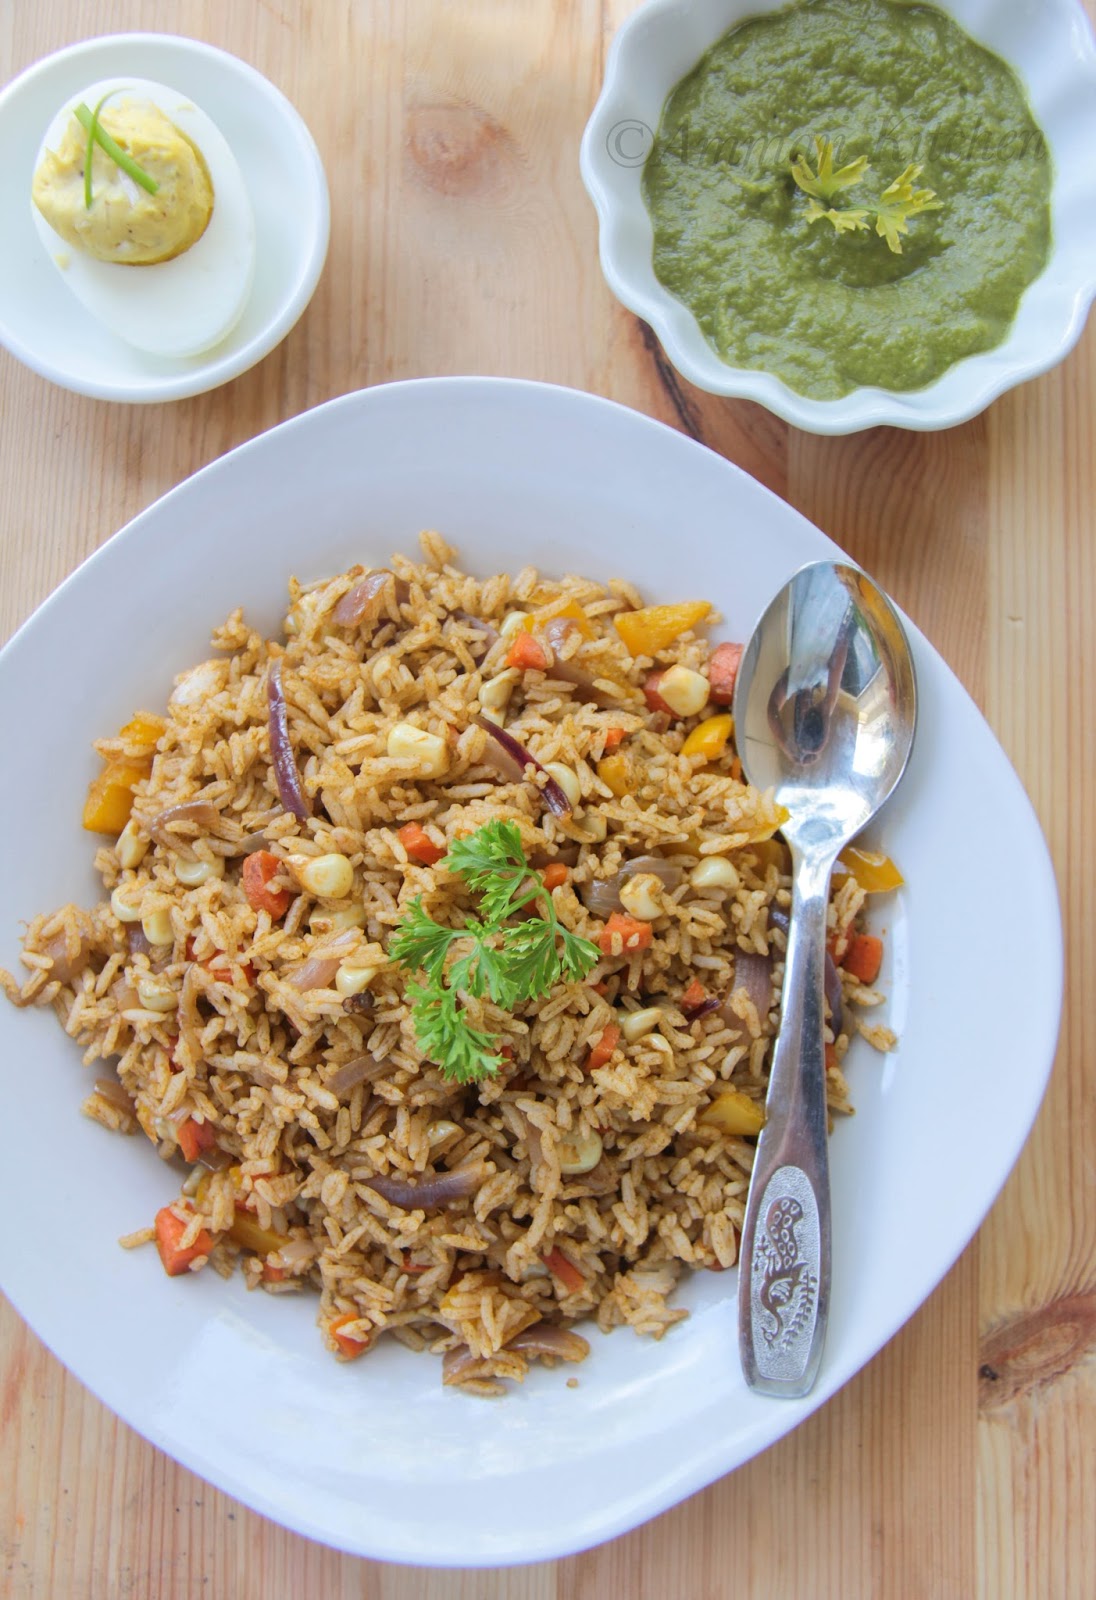
Arroz Con Verduras is a Peruvian rice dish with vegetables & cooked with cilantro paste . This dish is mildly flavored & served with a Peruvian Green Aji Sauce as a side.
Peruvian dishes are one of our {me & hubby} favorite foods.The near by Peruvian restaurant made us hooked to their food. Oh.. They have a live music on weekends & it's just awesome. My hubby is totally in to this Peruvian Green Aji Sauce & the fried rice they make. So I decided to make them at home for this marathon & we loved the outcome.
Cilantro green paste is heart of this dish. The recipe I followed, suggested adding few spinach leaves to control cilantro taste. I added few basil leaves to make it much tastier though it is not authentic to add them. 
Peruvian Green Aji Sauce is a special sauce made of lettuce, garlic & cilantro. The taste of this sauce is heavenly & very addictive. I made it as a side dish, but felt it needs some improvement & hence I skipped posting it here.
To know what my other friends are cooking, check out the Blogging Marathon page for the other Blogging Marathoners doing BM# 44
Arroz Con Verduras
Adapted from here.
Prep Time-15mins | Cook Time-25mins | Serves-2People
Ingredients 
1&1/2Cups short grained rice {uncooked}
2&1/2Cups water 
For the gravy 
2Cups cilantro
8Leaves spinach 
8Leaves basil 
5Green chili's 
1Big onion chopped 
3Garlic minced
1Yellow bell pepper
2Carrots finely chopped
1Cup fresh corn 
2Tbs tomato paste {optional}
2Habanero chili deseeded & chopped {Very spicy} {Optional}
3Tbs oil
Salt to taste
Directions
- Heat pan with oil, to that add onions & minced garlic. Cook on low heat till onions are translucent.
- Meanwhile grind cilantro, spinach, basil, tomato paste & green chili's to a smooth paste. If needed, add a little water to grind.
1.Stove Top Method
- Add in carrots, bell pepper, corn & chili to pan along with the grind paste. 
- Add in rice & enough water to cook rice. Add salt & cook it with a closed lid. Once the rice is done adjust salt if needed & switch off heat. 
2.Electric Cooker  
- In electric cooker add water, vegetables, rice & green paste we made along with salt. Mix well & cook according the cooker instructions. Once rice is cooked puff up & serve warm.
3.The Third Way
- Cook rice separately & cool it off. 
- Now to the onion pan  add in carrots, bell pepper, corn, salt & chili along with the grind paste. 
- Mix well & cook veggies with a closed lid.
- Once the veggies are cooked, switch off heat & allow it to cool. 
- Now mix in cooled off rice with the gravy & adjust salt if needed. 
- Allow it to sit for 30mins before serving. 
Note
- Exclude habanero chili's, basil leaves & tomato paste from the recipe for a authentic dish. 
Arroz Con Verduras
Follow me on "Facebook", "Google+", "Pinterest" for daily updates. Leave me a comment on any queries regarding this recipe & I will be able to answer it for you as soon as possible.

Wednesday, August 6, 2014

Pulagam

Pulagam is a Neivedyam you offer to god. It is made of rice, mong dal & ghee by cooking together. It looks dry & can be consumed as normal rice, along with dal, curries, rasam & curd. 
Pulagam is made as daily neivedyam to god.It can also be offered on auspicious & festive occasions. While offering as prashad we top it with little ghee, jaggery & then offered it to god. 
Sravanamasam is a auspicious month & that too tuesdays & fridays are the most important days of this month. So I make this pulagam on these 2days along with a sweet dish & offer it to god. 
Prep Time-5mins | Cook Time-20mins {Electric cooker}
Ingredients 
2Cups rice 
4Cups water
1/2Cup moong dal
1Tbs ghee
Piece of Jaggery
Directions 
- In cooking vessel add rice & dal. 
- Wash them with lots of water. 
- Now add 4cups water & ghee to the cooking vessel. 
- Place it in the electric cooker & switch on. 
- Once the rice is done, allow it to cool for few mins. 
- Top it with a piece of jaggery & ghee. 
- Pulagam is ready for neivedyam.
Note
- If you are using pressure cooker, than you might have to adjust water level. 

Monday, July 7, 2014

Gopalkala

For this week theme on BM I'm presenting "Festival Special-Krishna Janmashtami". Enjoy the dishes & don't miss the update. Check out the Blogging Marathon page for the other Blogging Marathoners doing BM# 42.

Gopalkala is a Janmashtami special dish, made of poha, curd & some seasoning to it. Apart from being a festive dish it is a cooling dish for summer days. This is a simple dish, which takes very few minutes of time in making it & tastes delicious. This dish is similar to south indian "Dadojanam" or curd rice & the only difference is we make this with beaten rice or poha.

Prep Time-15mins | Cook Time-2mins | Serves-2People
Ingredients 
1Cup poha
1Cup curd 
1/2Cup grated fresh coconut
2Green chili's chopped
1Tsp finely chopped ginger
1Tbs ghee
1Tsp jeera 
Salt to taste
cilantro/coriander leaves for garnish
Directions
- Add poha to a sieve & wash them with water. Allow poha to sit for 10mins. 
- Mean while heat pan with ghee & to that add jeera, green chili's & ginger. 
- Fry them for few seconds & switch off heat. 
- Add curd, coconut, salt & the fries seasoning to poha. 
- Mix them well & garnish with coriander. 
Note
- Using a sifter will filter the leftover water from poha. 
- You can add chopped cucumber at the end before adding coriander.
Follow me on "Facebook", "Google+", "Pinterest" for daily updates. Leave me a comment on any queries regarding this recipe & I will be able to answer it for you as soon as possible.


Tuesday, May 6, 2014

Tomato Onion Raita


Raita is a side dish served along with biryani, pilaf & many rice dishes. Raita is simple & easy to make. It accompanies rice dishes & completes the meal. This raita is a one of the many variations you can make. 

Prep Time - 5mins | Serves-2people
Ingredients

1Cup Curd
1/4Cup water {Adjust water as needed}
1/4Cup finely chopped onion
1/4Cup finely chopped tomatoes
1/2Tsp cumin powder
2Green chili's chopped
Cilantro to Garnish {Coriander leaves}
Salt to taste
Directions 
- In a bowl mix curd & water. Mix them to a smooth paste. 
- Add onions, tomatoes, green chili's, cumin powder & salt. 
- Garnish with coriander leaves. 
- Serve as a side to rice dishes. 
Follow me on "Facebook", "Google+", "Pinterest" for daily updates. Leave me a comment on any queries regarding this recipe & I will be able to answer it for you as soon as possible.

Monday, May 5, 2014

Biryani Chammanthi | Green Coconut Chutney


Biryani Chammanthi or green coconut chutney is accompanied as a side dish for malabar biryani. This side dish is creamy & spicy. It goes well with biryani & other flavored rice dishes. The greens in this chutney give it a nice tint of color & also add flavor to it. The other variation of this chutney is you can replace yogurt with lemon juice in the chutney.


Prep Time-5mins | Serves-2people 
Ingredients 
1Cup grated coconut
2Tbs chopped mint
2Tbs chopped coriander leaves 
1Garlic chopped 
3Green chili's {Adjust as needed}
1/4Cup yogurt
Salt to taste
Directions
- Grind all the ingredients above to smooth paste. 
- Adjust salt & green chili's if needed. 
Note
- Don't add water while grinding. 
- Replace yogurt with 1Tbs of lemon juice or as needed. 


Follow me on "Facebook", "Google+", "Pinterest" for daily updates. Leave me a comment on any queries regarding this recipe & I will be able to answer it for you as soon as possible.


Thursday, April 17, 2014

Jadoh {Khasi Pulao}

Khasi Pulao

Jadoh is a rice dish which is mild in flavor & taste. It slightly resembles pulao/pilaf but with out much of spices. This Meghalaya dish, originated from Khasi region is traditionally a non-vegetarian one & I tried making it almost authentic & vegetarian. 


Khasi Pulao
Prep Time-5mins | Cook Time-30mins | Serves-2people
Adapted From: Indian Recipes
Ingredients
2Cups basmati rice 
3Cups + 2/3Cups Water
2Carrots chopped
1Medium onion
1Tbs ginger paste
1/2 Tsp turmeric
2Tbs black peppers powdered
5 Bay leaves 
1Tbs oil + 1Tbs ghee
1/4Cup mint leaves
Salt to taste
4Boiled eggs {optional}
Coriander for garnish
Directions
- Heat pan with oil + ghee. Add bay leaves, onions & ginger to pan. Saute for few seconds till the raw smell of ginger goes off. 
- To the same pan add carrots, turmeric & black pepper powder. Cook for 1min & switch off heat. 
- Wash rice with lots of water & to that add the cooked masala along with water.
- Mix enough salt & mint leaves to cooker. Taste & adjust salt if needed. 
- Cook rice as per your convenience. {Pressure cooker, electric cooker & stove top}
- Once rice is done garnish it with cilantro & boiled eggs. 
- Serve it along with a gravy dish of your choice. 
Note
- You can use any choice of short grained Indian rice in place of basmati.
Khasi Pulao
Follow me on "Facebook", "Google+", "Pinterest" for daily updates. Leave me a comment on any queries regarding this recipe & I will be able to answer it for you as soon as possible.